
This page lists answers to often asked questions about TablePress. For more details, please refer to the Documentation. TablePress Premium features have their own documentation pages.
Styling, Layout, and CSS
How and where do I add “Custom CSS” code?
To add CSS commands (Cascading Style Sheets), just go to the “Custom CSS” text area on the “Plugin Options” screen of TablePress and enter them there. They will override the default styling, so that you do not have to change any files directly (such modifications would be lost after each TablePress update).
Please note that you must not add the CSS code to the “Custom Commands” text field on the table’s “Edit” screen. That field is used for a different type of code.
How can I change the colors of a single row?
Changing the text and the background color of a single row, e.g. to highlight it, can be done with some CSS like this:
.tablepress-id-N .row-X td {
	background-color: #ff0000;
	color: #00ff00;
}Code language: CSS (css)
where N (the table’s ID), and X (the number of the row) need to be adjusted to your table! #ff0000 is the HEX color code of the desired color, in this case red. You can change both the text color (via the color property) and the background color (via the background-color property).
This CSS code needs to be entered into the “Custom CSS” text field on the “Plugin Options” page of TablePress.
How can I change the colors of the table head row?
This can be done with the some CSS code that needs to be added to the “Custom CSS” textarea on the “Plugin Options” screen of TablePress:
.tablepress {
	--head-text-color: #111111;
	--head-bg-color: #d9edf7;
	--head-active-text-color: #111111;
	--head-active-bg-color: #049cdb;
}Code language: CSS (css)
Here, the lines starting with -- indicate variables for the colors, with text being the text color and bg denoting the background color, of the table head and footer rows. The lines of code with active in the variable name indicate the colors of hovered header cells and the colors of header cells that are currently sorted. Just change the HEX color values as desired. You only need to specify the lines that you want to change.
If you prefer a visual interface for changing colors, check out the Default Style Customizer feature that is part of the TablePress premium license plans.
If you just want to change this for a specific table, use .tablepress-id-N (with N being the table’s ID) as the selector, instead of .tablepress.
If the CSS code from above does not work, you can also try this alternative CSS code:
.tablepress thead th,
.tablepress tfoot th {
	background-color: #ff0000;
	color: #00ff00;
}
.tablepress thead .sorting_asc,
.tablepress thead .sorting_desc,
.tablepress thead .sorting:hover {
	background-color: #00ff00;
	color: #00ff00;
}Code language: CSS (css)
You can change both the text color (via the color property) and the background color (via the background-color property).
How can I change the colors used for marking alternating rows?
This can be done with the some CSS code that needs to be added to the “Custom CSS” textarea on the “Plugin Options” screen of TablePress:
.tablepress {
	--odd-text-color: #111111;
	--odd-bg-color: #f9f9f9;
	--even-text-color: #111111;
	--even-bg-color: #ffffff;
}Code language: CSS (css)
Here, the lines starting with -- indicate variables for the colors, with text being the text color and bg denoting the background color, either for odd or even rows. Just change the HEX color values as desired. You only need to specify the lines that you want to change.
If you prefer a visual interface for changing colors, check out the Default Style Customizer feature that is part of the TablePress premium license plans.
If you just want to change this for a specific table, use .tablepress-id-N (with N being the table’s ID) as the selector, instead of .tablepress.
If the CSS code from above does not work, you can also try this alternative CSS code:
.tablepress > :where(tbody.row-striping) > :nth-child(odd) > * {
	background-color: #ff0000;
	color: #00ff00;
}
.tablepress > :where(tbody.row-striping) > :nth-child(even) > * {
	background-color: #00ff00;
	color: #0000ff;
}Code language: CSS (css)
You can change both the text colors (via the color property) and the background colors (via the background-color property) of odd and even rows.
How can I change the color used for highlighting hovered rows?
This can be done with the some CSS code that needs to be added to the “Custom CSS” textarea on the “Plugin Options” screen of TablePress:
.tablepress {
	--hover-text-color: #111111;
	--hover-bg-color: #f3f3f3;
}Code language: CSS (css)
Here, the lines starting with -- indicate variables for the colors, with text being the text color and bg denoting the background color, for the currently hovered row. Just change the HEX color values as desired. You only need to specify the lines that you want to change.
If you prefer a visual interface for changing colors, check out the Default Style Customizer feature that is part of the TablePress premium license plans.
If you just want to change this for a specific table, use .tablepress-id-N (with N being the table’s ID) as the selector, instead of .tablepress.
If the CSS code from above does not work, you can also try this alternative CSS code:
.tablepress .row-hover tr:hover td {
	background-color: #ff0000;
	color: #00ff00;
}Code language: CSS (css)
You can change both the text color (via the color property) and the background color (via the background-color property).
How can I change the font, text size, and text color of a table?
This can be done with the some CSS code that needs to be added to the “Custom CSS” textarea on the “Plugin Options” screen of TablePress:
.tablepress-id-N tbody td {
	font-family: Tahoma;
	font-size: 14px;
	font-weight: bold;
	color: #ff0000;
}Code language: CSS (css)
The N needs to be changed to the ID of the table in question (or use .tablepress as the first part of the selector to have this code apply to all TablePress tables on the site). The values for font-family, font-size, font-weight and color can of course be adjusted or removed, if they are not needed.
If you prefer a visual interface for changing colors, check out the Default Style Customizer feature that is part of the TablePress premium license plans.
How can I highlight certain cells or their content?
If you know the row and column numbers of the value in question, you could use CSS code in the “Custom CSS” textarea on the “Plugin Options” screen of TablePress like
.tablepress-id-N .row-X .column-Y {
	background-color: #ff0000;
	color: #ff0000;
}Code language: CSS (css)
where N (the table’s ID), X (the number of the row), and Y (the number of the column) need to be adjusted to your table.
If you don’t know the row and column numbers (or they sometimes change, or you have more than on value to highlight), I recommend creating a new CSS class for a HTML <span> element. You would then wrap the value in the span tag, like
<span class="highlight-1">your first important value</span>
<span class="highlight-2">your second important value</span>Code language: HTML, XML (xml)
and could create approriate CSS like
.tablepress .highlight-1 {
	color: #ff0000;
	text-decoration: underline;
}
.tablepress .highlight-2 {
	color: #00ff00;
	font-weight: bold;
}Code language: CSS (css)
Here, highlight-1 and highlight-2 are just examples for possible CSS class names. You can adjust these to give their names a meaning, but have to be consistent in HTML and CSS code.
If you would like to changing the styling of rows or cells automatically, based on their content, check out the Row Highlighting and Column Highlighting features that are part of the TablePress premium license plans.
How can I set column widths?
Setting column widths for your tables is possible with a short piece CSS code that just needs to be added to the “Custom CSS” textarea on the “Plugin Options” screen of TablePress:
.tablepress-id-7 .column-2 {
	width: 100px;
}Code language: CSS (css)
This example would set the column width of the second column of the table with ID 7 to 100 pixels. Adjust these numbers as needed.
This is the general pattern that I recommend. You can use this as often as needed, changing the column in question to the correct number each time. If you want to set multiple columns to the same width, follow the pattern
.tablepress-id-7 .column-2,
.tablepress-id-7 .column-4,
.tablepress-id-7 .column-8 {
	width: 150px;
}Code language: CSS (css)
Note: In most cases, it is not necessary to set the column widths directly! Instead, you might want to reduce the padding (the white space between the text in a cell and the edges of a cell), with the CSS code
.tablepress-id-7 {
	--padding: 4px;
}Code language: CSS (css)
which again needs to be adjusted as above.
To apply such a change to all tables on your site, use .tablepress as the first part of the selector, instead of .tablepress-id-7.
Please keep in mind that it will not always be possible to reduce the width of a table column, as by default the longest single word or other content in a column defines that column’s minimum width. You might therefore have to employ a solution to make your table “responsive”, e.g. by using the Responsive Tables feature module that is available in TablePress Premium plans, especially on smaller screens, like phones and tables.
When trying to increase the width of a column, you will need slightly extended CSS code, if that table already uses a width that is bigger than the available content area and therefore uses horizontal scrolling:
.tablepress-id-7 .column-2,
.tablepress-id-7 .column-4,
.tablepress-id-7 .column-8 {
	width: 250px;
	min-width: 250px;
}Code language: CSS (css)
By defining the minimum width as well, the browser will make the column wider even though the table already uses horizontal scrolling.
How do I center a table on the page?
Normally, tables extend to the full width of the container element they are added to. Sometimes, for tables with few columns, it might however look better to reduce the table’s width and center it on the page. This can be done with the some CSS code that needs to be added to the “Custom CSS” textarea on the “Plugin Options” screen of TablePress:
.tablepress-id-N {
	width: auto;
	margin: 0 auto 1em;
}Code language: CSS (css)
The N needs to be changed to the ID of the table in question (or use .tablepress as the first part of the selector, if you want this to apply to all TablePress tables on your site).
How do I remove the borders from a table?
This can be done with the some CSS code that just needs to be added to the “Custom CSS” textarea on the “Plugin Options” screen of TablePress:
.tablepress-id-N,
.tablepress-id-N tr,
.tablepress-id-N td,
.tablepress-id-N th {
	border: none;
}Code language: CSS (css)
In this code, the N needs to be changed to the ID of the table in question (or use .tablepress as the first part of the selector (five times) to remove the border from all TablePress tables on your site).
If you are still seeing border lines in your table after adding this code, it might be necessary to raise the priority of this command above the commands from e.g. your theme. For that, please change the line with the CSS property to
border: none !important;Code language: CSS (css)What CSS selectors are available?
The most important CSS selector is .tablepress as it applies to all TablePress tables on your site. If you don’t want to apply a styling setting to all tables, but just to certain ones, you can use .tablepress-id-N, where N is the ID of the table.
In most cases you’ll want to style table body cells, so the CSS command will look like this:
.tablepress-id-N tbody td {
	property1: value1;
	property2: value2;
}Code language: CSS (css)
Here, N has to be changed to the table’s ID, whereas property1 and property2 are just for demonstration and need to be changed to the CSS properties that you want to change.
You can find a more thorough list of available CSS selectors in the Documentation.
Troubleshooting
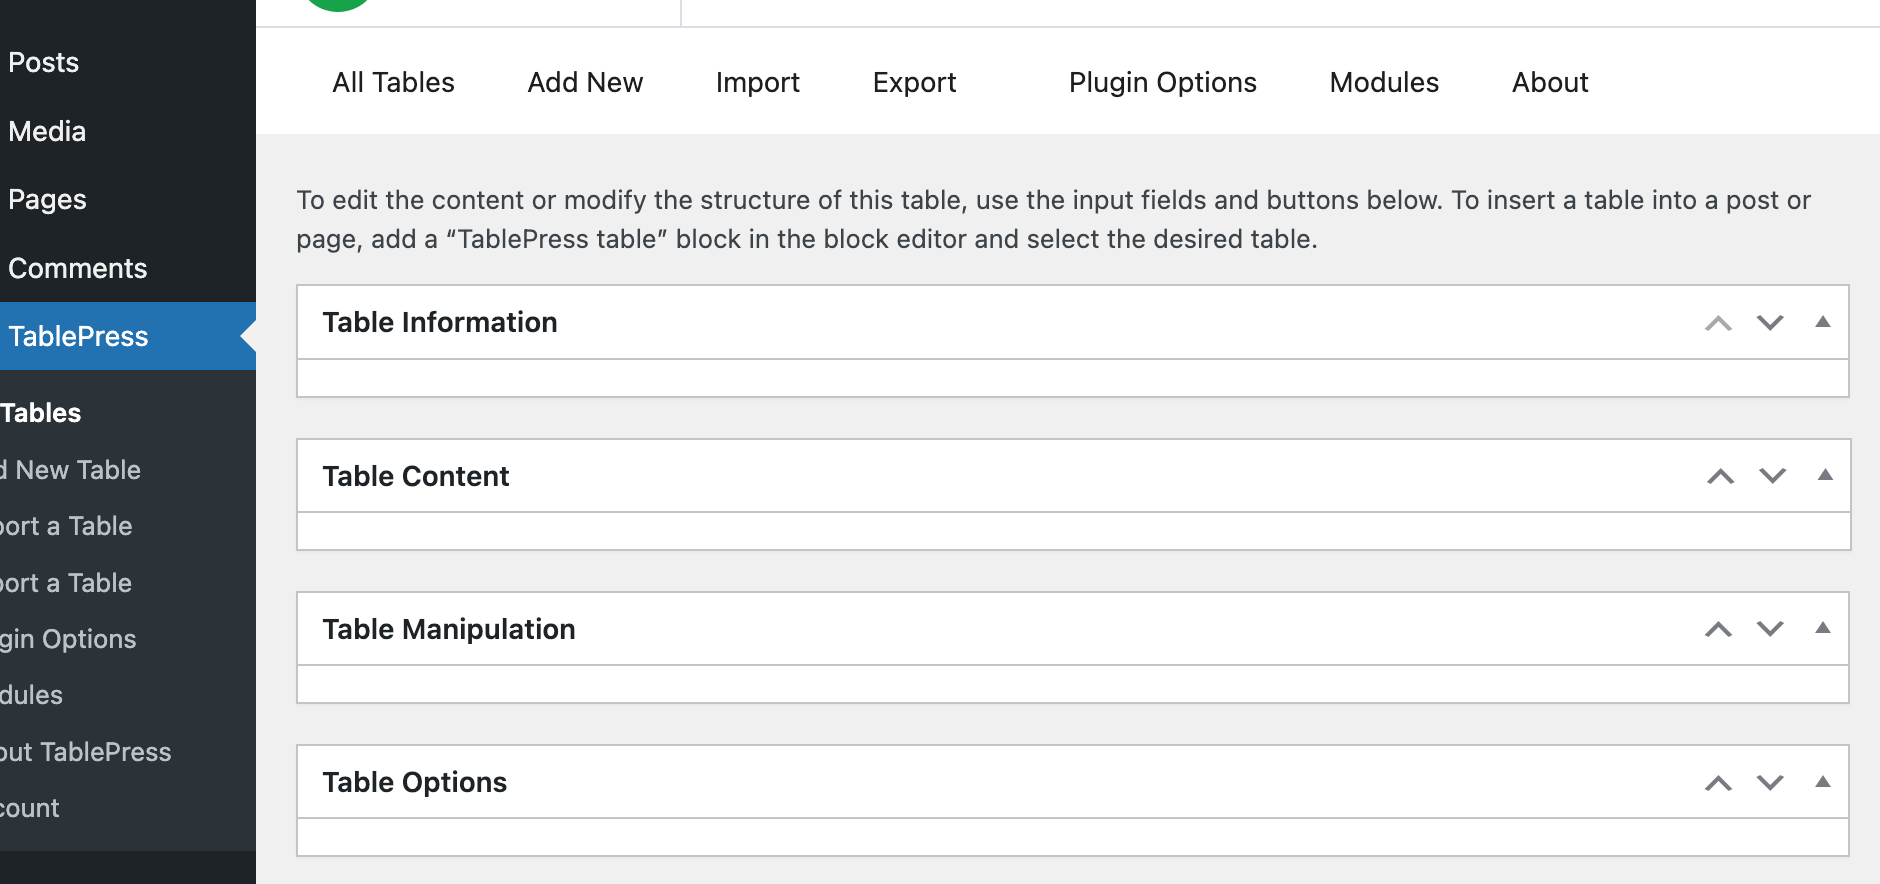
Only empty sections on the “Edit” screen
Some users experience issues when trying to edit their tables on the “Edit” screen of TablePress. Instead of seeing the usual table information, table content, or user interface buttons, the individual sections on the “Edit” screen are all empty, like in this screenshot:
The cause for this problem often is a caching issue, for which there are two possibilities:
TablePress Modules cache is stale
Users of TablePress Pro or TablePress Max, but not users of the free version of TablePress, might be affected by a caching issue on the server. Normally, this cache is automatically cleared when TablePress is updated, but sometimes this quick step has to be done manually, but only once.
To clear the “Modules” cache, please go to the “Modules” screen of TablePress and click the “Save changes” button at the bottom. No actual changes to the activate modules need to be made, simply clicking the button is enough. This will then clear the internal Modules cache, which might have become stale. The issue with the empty sections on the “Edit” screen should then disappear as well.
The browser loads an old WordPress file
TablePress users with Google Chrome or Safari as their web browser have reported that this issue was the result of their browser loading an old version of a WordPress file instead of the latest version. To solve this, please check your site is already using WordPress 6.7.2 or newer, and otherwise update WordPress. If the issue persists, it can help to clear the browser cache, e.g. via these instructions from the Chrome team (it will be similar for Safari).
After clearing the browser cache, Chrome and Safari will again load the latest version of the affected WordPress file, so that the issue with empty sections on the “Edit” screen of TablePress should disappear.
Other causes
If you are still experiencing this issue despite performing the suggestions from above, it’s possible that there is a JavaScript problem on the site. To find out more details about this error, please check the error log “Console” in the “Developer Tools” of the browser, available via the “Three dot” menu or a keyboard shortcut. The Console should then open in the bottom right part of the screen, with error messages highlighted in red.
If you find error messages related to TablePress in that Console, please get in touch for support with this and provide those error details.
TablePress is not showing in the menu of the Dashboard
If you can not see the TablePress entry in the left-hand side admin menu of your WordPress Dashboard, there is usually a small problem with the TablePress access rights and capabilities. This can sometimes happen during installation or if user access rights and user roles are edited later, e.g. by another plugin.
To restore the TablePress menu entry, you can try to reset the access capabilities. For that, please:
- Go to
https://example.com/wp-admin/options.phpin your browser, with your site’s URL instead ofexample.com. On this “All Settings” screen, you should see a list of internal WordPress configuration data, the so-called “WordPress Options”, with input fields to change their values. Be advised that this is a powerful tool, so please proceed with caution. - Scroll down to the
tablepress_plugin_optionsoption. (To reach it quicker, you could also use the browser search function, by typingCtrl/Cmd+F.) - In the text field next to
tablepress_plugin_options, find the text"plugin_options_db_version":. Right after that, there should be a number like109. (The exact number depends on the TablePress version and doesn’t matter here.) - Change that number to
0(zero), but please be very careful to not remove the surrounding quotation marks or other characters! - Scroll down to the bottom of the page and click the “Save Changes” button.
This process should reset the internal TablePress access capabilities, and you should be seeing the TablePress entry in the admin menu again.
Note that the number after "plugin_options_db_version": that you changed to 0 will have changed back to its original value again, which is the correct and expected behavior.
If this process did not restore the TablePress menu entry, please contact us directly via email (support@tablepress.org) with the details to a temporary admin account to your site. We’ll then gladly take a direct look at this issue on your site.
Common Server Error Messages
When saving tables or other configuration changes, it is possible that you are getting error messages, due to some problem on the server. These errors usually indicate that the server configuration needs to be adjusted. This page lists some common error messages and possible ways to solve them.
HTTP error code 403 (Forbidden)
The error message
Attention: Unfortunately, an error occurred. There was a problem with the server, HTTP response code 403 (Forbidden).
indicates a server configuration problem, likely related to your server’s security or firewall software.
Often, these are configured very strictly, so that they run into “false positive” errors when checking the data that is sent from your browser to the server. This could be the structure, the size, or even the content of the data in your table. This then probably triggers a security rule, because that software falsely thinks that an attack is happening. The software then blocks the request to save your table with that “HTTP 403 Forbidden” server error.
To fix this error, you will need to get in touch with the server admin or the webhost’s support team. They should be able to find the exact cause, and the security rule that triggered this, in the server error log files. Then, they will need to adjust and relax the configuration so that the false positive is no longer triggered.
HTTP error code 500 (Internal Server Error)
The error message
Attention: Unfortunately, an error occurred. There was a problem with the server, HTTP response code 500 ().
indicates a generic “Internal Server Error”, which usually means that there is a problem with the server configuration.
One common cause is that the so-called PHP Memory Limit was reached, e.g. when trying to save a large table. A good first step to solve such a problem is to increase this limit, which is often possible by increasing the value of the WordPress configuration constant WP_MEMORY_LIMIT in the site’s wp-config.php configuration file on the server. For some background on this, please see the WordPress documentation.
Editing the wp-config.php file is a slightly advanced task, but it’s not complicated. First, find a way to edit the PHP files on your server, e.g. by logging into your site or server via an FTP program or a SSH terminal. Your hosting company might also be providing a file management tool in your hosting account’s configuration panel. After opening the file for editing, check or search if there already is a line similar to
define( 'WP_MEMORY_LIMIT', '1024M' );Code language: PHP (php)If there is such a line, change the value in function’s second parameter to e.g. 1024M or 2048M, but make sure to not accidentally remove any of the single quotes ' around the value.
If there is no such line, simply add it — but make sure to add it before the line
/* That's all, stop editing! Happy publishing. */Code language: plaintext (plaintext)After this, you can check if the new value for the PHP Memory Limit is being by checking the “Debug and Version Information” section on the “About” screen of TablePress.
Alternatively to editing the wp-config.php file, you could try editing the PHP.ini configuration file in your hosting account, if available. In that PHP.ini file, find the line similar to
memory_limit = 64M ; Maximum amount of memory a script may consume (64MB)Code language: plaintext (plaintext)and also try configuring higher values like 1024M or 2048M.
If you don’t have access to PHP.ini file, you can try adding this to an .htaccess file on the server:
php_value memory_limit 1024MCode language: plaintext (plaintext)If the issue persists, it might be worth checking if the reached PHP Memory Limit actually is the cause of the problem. For this, you can check the server’s PHP error log file. If you don’t have access to that yourself, usually also via FTP or in your hosting account’s configuration panel, you can ask your hosting company’s support team for this.
Tables are corrupted and show “[ERROR] TABLE IS CORRUPTED”
While seeing this error is (understandably) scary, please remain calm—in almost all cases it’s possible to restore the table data. This page tries to provide some guidance for that.
Background
Internally, TablePress stores tables as two-dimensional fields or arrays. To be able to store these in the database, these arrays are encoded to text strings in the JSON format. In this widely used and open data format, certain characters like quotation marks ", backslashes \, and square brackets [] serve as control characters and have special meanings. Therefore, when these characters are used in the actual content, precautions have to be taken to not mix them up with their control character function when it comes to reading (decoding to its original representation) the JSON text string again. This is done by escaping these characters with a prepended backslash \. For example, a quotation mark " is actually stored as \" internally.
All this is completely irrelevant when working with tables in TablePress, as everything regarding loading (decoding) and storing (encoding) the data happens automatically behind the scenes. The escaping however is one reason why JSON text strings are fragile when it comes to direct data manipulation—that is when working with the stored JSON data as plain text outside of TablePress—in contrast to first decoding it to its original data structure.
For example, a process that works with a raw JSON text string must never add extra quotation marks " to it, but it needs to appropriately escape them as \" first. It is also not directly allowed to just append or add extra content or data to the end of a JSON string that represents an array internally. If such a wrong data manipulation is done, the JSON text string will not have the correct format for it to be decoded to its original representation again—the JSON data is corrupted.
Causes for table data corruption
Possible causes for such corruption of TablePress tables mainly are the wrong or careless handling of JSON content in the database, by other plugins, themes, or even WordPress itself, or security breaches and hacks of websites, databases, or servers. From a more technical perspective, this can for example mean that something on your site or server
- removed the escaping backslashes
\, e.g. by wrongly using the PHPstripslashes()function, - inserted content that includes quotation marks
"into the JSON string, but without the mandatory escaping backslashes\, - or appended extra text or code to the end of the JSON string.
While the first of these possibilities does not happen often anymore, the problem of text or code being automatically appended to the JSON strings can still be observed at a small but constant rate. Very often, this is done by automated scripts that append malicious HTML and JavaScript code to all posts, pages, and tables of a site, with the intent to possibly infect the visitors’ computers with malware or to display ads on your site. One indicator that your site or database might have been hacked and modified in this way is that all TablePress tables show the corrupted data error.
The second mentioned possibility became a problem for some time with the release of WordPress 5.1 at the end of February of 2019, due to a bug in it. In most cases, only a few but not all tables on the site would be affected here, and only if they contained certain HTML code for a clickable link.
Fixing and restoring corrupted table data
You most likely were directed to this page by a notice on the TablePress screens of your site, telling you that the internal data of a table is corrupted. This means that the JSON text string that was read from the database could not be decoded into a two-dimensional array properly. To fix the JSON text string, the wrong parts in it have to be identified and either be corrected or be removed. To stick with the possible causes from the previous section, content that was added without the escaping backslash \ probably just needs that inserted, while extra HTML <script> tags from a hacking script need to be removed from the end of the JSON code.
For most cases that we have seen in the past, this process can be automated. We therefore developed a WordPress plugin, the “TablePress Extension: Fix corrupted tables”, that will do this for you.
- To restore your corrupted tables, please download the “TablePress Extension: Fix corrupted tables” plugin as a ZIP archive to your computer.
- In your WordPress admin dashboard, go to “Plugins” -> “Add New”, and click the “Upload Plugin” button near the top.
- Choose the ZIP file that you downloaded in step 1 and upload it. (Alternatively, you could extract the ZIP archive and upload the contained folder to your site’s
/wp-content/plugins/folder via your FTP program.) - On the next screen, click the “Activate Plugin” button.
- The Extension will then try to fix the internal JSON data format of the TablePress tables by performing simple search/replace operations in your database.
- After this, you will see a notice text at the top of the screen about the process, including some success statistics, and a suggestion to create a backup. For this, the WP Staging plugin is a great solution, as it makes backups very easy.
- Finally, you may go to the “Plugins” screen and “Deactivate” and then “Delete” the “TablePress Extension: Fix corrupted tables” plugin again.
- In addition, on the “Plugins” screen, please make sure that you have updated TablePress to the latest version!
Please be assured that I’m very sorry that you experienced corrupted TablePress tables on your site! We are doing everything we can to prevent this in TablePress, but unfortunately, we can’t protect your table data from external influences on the database, like other plugins or scripts with malicious intent. It is therefore always recommended to keep a backup of your site as a whole, and your tables in particular, e.g. by exporting them to files.
If you find that the Extension did not restore all your TablePress tables, it is possible that they are corrupted in other ways. Most likely, we’ll still be able to restore the data. For help with that, please contact us directly via email (support@tablepress.org) with the details to a temporary admin account to your site. We’ll then gladly take a direct look and assist with restoring your table data!
On this page
Sorting or other Table Features for Site Visitors are not working
If the “Enable Visitor Features” checkbox is checked on a table’s “Edit” screen, but functions like sorting, search, pagination, or from TablePress Premium modules are not working in your tables, this usually indicates a JavaScript problem.
To check for that, please use the built-in “Developer Tools” of your browser. Right click your page and pick “Inspect Element”. You should then see the “Developer Tools”, where you can switch to the “Console” tab to see JavaScript problems on the page.
Depending on the shown error messages, we can then narrow down the cause. Here’s a list of common possible error messages and their causes:
Error: Uncaught TypeError: Cannot read property 'mData' of undefined
This error message indicates a problem with the table structure. The DataTables JavaScript library requires that the table has a rectangular structure, which means that every row must have the same number of cells. Unfortunately, this means that it is not possible to use both the JavaScript features and cell merging/combining, using the #colspan# or #rowspan# keywords, at the same time. You will have to decide what’s more important for your table: Using the JavaScript features or combining cells. Having both for one table is not possible.
If you are not using the #colspan# or #rowspan# keywords in the affected table, chances are high that the HTML code in your table is broken somewhere. A visual indicator for this can be that content or cells in the table are shifted, e.g. they are shown on the left of the other cells in the same column. Very often, this happens when using HTML code for a link in the table. It is very important that e.g. quotation marks " are used properly around the values of HTML tag attributes, e.g. around the URL after the href= attribute. Please check that this is the case for all HTML tags in your table.
Error: Uncaught ReferenceError: jQuery is not defined
A common reason for this error message is the use of plugins that minify, concatenate, or try to optimize the loading of JavaScript or CSS files on your site. Due to the large variety of plugins, these sometimes can not properly maintain script dependencies or the necessary loading order of files. If you see this error, you should therefore try again after temporarily deactivating any such JavaScript/CSS optimization plugins.
Another reason for this is error could be that an old and outdated version of the jQuery JavaScript library is loaded on your site. There are some themes and plugins that still do this, even though WordPress already ships with the correct and up-to-date version of jQuery. To check for this, please search the generated HTML source code of the page with the table (accessible via the “View Source” feature in your browser) for the string jquery. If there’s more than one result within HTML <script> tags, this means that the library is loaded multiple times. If that is the case, the loading of the old versions should be stopped, so that only the version that comes with WordPress is loaded. This usually means deleting a line similar to
<script src="/js/jquery.js">Code language: HTML, XML (xml)from the theme’s “header.php” file. Other variants are lines like
wp_deregister_script( 'jquery' );
wp_register_script( 'jquery', ... );Code language: PHP (php)
in the “functions.php” file.
No or other error messages
If you don’t see any JavaScript errors, please make sure that the “Enable Visitor Features” checkbox is really checked on the table’s “Edit” screen. Please also check if the JavaScript code that loads and initializes the DataTables JavaScript library is part of the generated HTML source code of the page. To check for this, please search that source code (again accessible via the “View Source” feature in your browser) for e.g. datatable.
If you are seeing other error messages than those from above, or if you are seeing other unexpected behavior of the JavaScript library, please open a new topic in the TablePress support forums, and make sure to include a link to the page with the table where this error happens!
General
Migration from WP-Table Reloaded
If you are still using the outdated and discontinued plugin WP-Table Reloaded on your website, it is strongly recommend to switch to its official successor TablePress. WP-Table Reloaded has been discontinued in 2013 and will no longer receive any updates or support.
Please follow the migration guide to switch from WP-Table Reloaded to TablePress.